You can create universe using universe designer tool or Information design tool in SAP 4.1. The Universe creation process completely different and the functionalities used in IDT to create universe is phased in different resources. This post is to explain the basic process of creating universe (.unx) using IDT.
Login to Information Design Tool.

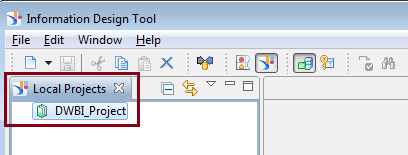
Local Project:
First create local project. Go to File—New—Project. Provide the proper project Name and location where you want to store the local project.

Local project created as below.
Relational Connection:
Right Click the Local Project and create New Relational Connection. Provide all the required details to create Relation Connection.


Data Foundation:
Create New Data Foundation under DWBI_project.

Click Next and then select your data sources (single Source or Multiple source) and here I have shown the Data foundation creation by using single data source.

Click Next and it would show all the available connections under DWBI_project and here we have only one connection created under DWBI_project and select that connection for this Data foundation.

Click Finish. Plain Data foundation layer would be available to insert necessary table, alias, joins, etc.

Click Insert and select Insert Tables.

In Insert table section, you can select the tables whatever you need to pull into your structure, select all of them and then click Insert.

Create join between tables and setup cardinality for the same. Also detect / manually validate is there any loops in your data foundation and fix those loops by using alias / context based on your requirement.
Business Layer:
Go to File–New—Business Layer to create class, objects and other parameters and LOV’s.
Select the Data source for the business layer and create Business layer by providing Business Layer Name and description.


Once you provided the business layer inform then select the Data found from where you want to create classes and objects.

Since we have select “Automatically create folder (class) and objects” check box, Business Layer would created the Folders & Object based on the available tables in your selected Data foundation.

You can edit / update the universe objects by clicking the particular object in the Business Layer window and I will open the edit window next to the Business Layer. You can convert Dimension objects to Measure object by right click the object and click “Turn into Measure with Aggregation Function” and its vice versa for Measure to Dimension object.

Business Layer – Queries:
Use the Query Panel to build, test, and preview the results of queries on a business layer or published universe.
Go to Queries, and click insert option as shown below and created your testing query and validate the data.


Once you have completed the folders, Object and queries then save project and do Check integrity to make sure you project is error free.
When a business layer is complete, it is published to a repository or a local folder as a universe. A universe is a published .unx file that includes a business layer and its connection to an OLAP cube, or a business layer and its corresponding data foundation. The universe is available in the repository to SAP Business Objects data analysis and report creation applications.
Publishing resources:
Publication is the last step in the universe creation process. Using the Publish Universe Wizard, you publish a business layer to either your local file system or a repository. When you publish a business layer, the wizard exports the business layer and the resources it references (local connection, connection shortcuts, and data foundation), and creates a universe which is then available to users of query, reporting and analysis tools.
Publishing locally
Only business layers built on local connections can be published locally. This can be a business layer based on a local OLAP connection, or a business layer based on a single-source data foundation with a local connection. The published universe is saved in the local file system folder that you specify.
Publishing to a repository
To secure a universe, you must publish it first to a repository on a Central Management Server (CMS). The universe inherits the object-level security and user security rights defined for the CMS. The data and metadata in the universe are secured by defining security profiles in the information design tool Security Editor.
When you create a connection in a local project, it is an unsecured local connection and must be published before you can publish a business layer that references the connection. To secure a connection, publish it to a repository on a CMS. The Publish Connection Wizard creates the secured connection and provides a connection shortcut for the local project. To browse and manage resources once they are published to a repository, use the Repository Resources View.
Once you published your universes, you can create Webi reports and validate the your data.
This post would explain the basic process of universe creation using IDT tool and you would expect in depth details for each & every resources / functions in IDT in future posts. Feel free to post your comments and I would be happy to assists.
